Making The Video
It took me a few hours because I had absolutely no clue what I was doing.
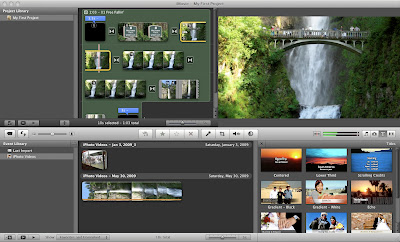
Importing the video was simple enough as iPhoto simply pulled it in from my camera just like the still photos. I then started a "project" in iMovie and was able to quickly drag and drop the video into the project area.

Clicking on the icons on the far righthand side of the middle bar gave me access to title templates, transitions, my photos, and iTunes music. I mostly used cross dissolves to transition between photos and used the "Ken Burns" effect to pan slowly across a photo in the style made famous by the documentary maker.
By adjusting the timing of this pan-and-zoom effect, I was able to align the timing of the transitions between pictures with breaks in the music.
Publishing The Result
I then created a YouTube account and linked it to this blog, and finally published the finished video directly from iMovie. Interestingly, it not only took 5-10 minutes for my video to show up, but initially the quality was significantly worse while it continued processing the uploaded video.

Related:
- A Quick Trip To Portland, Oregon (6/5/09)
- My First Video: Multnomah Falls, Oregon (6/6/09)
- Country Dancing in Portland, OR (6/7/09)
- Dining in Portland, Oregon (6/9/09)
- Waterfalls: Columbia River Gorge, OR


No comments:
Post a Comment